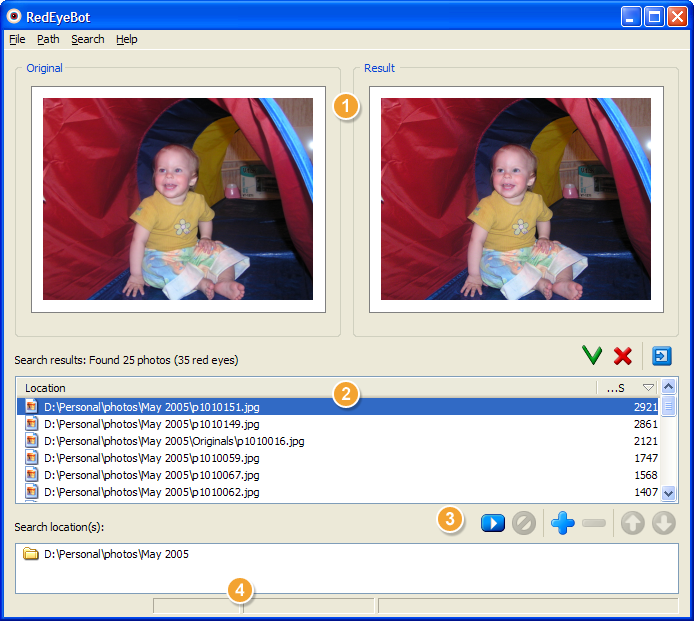
Red-eyes Search Results
After you've made the desired selection in the Getting Started dialog, RedEye Bot starts the search in the given location.
Photos with red-eyes detected immediately appear in the search results area
![]() and you can begin to work with them without interrupting the search running on the background.
and you can begin to work with them without interrupting the search running on the background.

Preview
In the Search results list, click the result of your choice. The selected original and red-eye removed photos pair is displayed in the preview area.
Move the mouse pointer over an original or fixed photo preview to see an area of the photo zoomed to original size.

Search Results
Search results list contains two columns: original file pathname and "score" level. By selecting a single result you can preview the photos in the Preview area. Click the name of the column in the list to order the results by this parameter.
Results Operation
- Click the
 button to accept the red-eye fixes for the photo (please note: you will always
have an option to undo the changes);
 - Click the
 button to reject the changes;
 - Click the
 button to open the selected photo in the RedEye Bot viewer for more
operations.
All operations performed are stored and can always be reverted back in the RedEye Bot Viewer application at any time later.
Search locations
You can manually manage the locations you'd like to be searched for photos with red-eyes:
- Click the
 button, browse to the needed folder in the dialog opened, click OK to add
the selected folder to the locations list.
 - Select the location in the list and click the
 button to remove
the selected location from the search list.
 - Use the
 and
and
 buttons to
sort the list.
After you have made an appropriate changes in the locations list, click the
![]() button (or press ENTER) to start the search. Click the
button (or press ENTER) to start the search. Click the
![]() button (or press
ESC) to stop the current search in progress.
button (or press
ESC) to stop the current search in progress.
Search progress
The current progress, number of files processed/total and estimating time remaining is displayed in the status bar during the currently running search.